Kubernetes OIDC Integration: How We Mastered K8s Authentication with Keycloak in Gardener KaaS
As we learned in our previous article, authentication plays a crucial role in securing modern cloud-native environments and managing it efficiently is critical, especially in complex, multi-cluster environments. OpenID Connect (OIDC) is widely adopted as the standard for integrating Identity Providers (IdPs) with Kubernetes and Keycloak, an open-source identity and access management solution, is a top choice for implementing OIDC.
A couple of months ago, our DevOps team had to tackle the challenge of integrating OpenID Connect (OIDC) via Keycloak for Gardener’s Kubernetes-as-a-Service (KaaS) setup. Our team delivered yet another c12n private cloud solution installation designed for distributed IoT applications and as a part of c12n we integrate GardenerKaaS.
However, this time the primary users were development teams working on multiple projects simultaneously, which requires not only tenant and network isolation, but also managed Kubernetes service, and centralized, secure access management. This is where we decided to integrate Keycloak in order to centralize authentication and authorization for Kubernetes.
This was not one of our usual implementations and with little to none documentation and examples on Gardener OIDC integration, we were confronted with multiple hurdles that we had to overcome before being able to achieve seamless integration.
Since Gardener CP components are integrated with and extend the Kubernetes API, its web interface (Gardener Dashboard) supports the same authentication mechanisms as Kubernetes itself. This makes it possible to leverage OIDC to provide secure, token-based authentication.
Before diving into the configuration, ensure the following are in place:
Keycloak Installed and Accessible: Keycloak should be up and running, reachable at a defined URL.
Gardener Dashboard Deployed: Ensure the Gardener dashboard is running in the same Kubernetes cluster as its control plane. (it is possible to run Gardener dashboard in any other place. But it would be simpler to do so in the same cluster)
Kubernetes Cluster Access: Administrative access to the Kubernetes cluster where Gardener is deployed.
SSL Certificates: Ensure the Kubernetes API server can securely communicate with Keycloak.
Configuration
Validating Tokens for the Gardener Dashboard
To enable OIDC login for the Gardener dashboard, the tokens issued by Keycloak toaccess the Gardener dashboard must be validated by the Kubernetes API, as suggested in the documentation. There are two ways to achieve this:
Separate OIDC Clients: Create separate OIDC clients in Keycloak for the Gardener dashboard and Kubernetes API, configuring audience mappers to return valid client_id values for both.
Single OIDC Client (Preferred Method): Use the same OIDC client for both the Gardener dashboard and Kubernetes API. This is the simpler approach, especially since Gardener’s dashboard is deployed in the same cluster as other control plane components. We chose this method for its simplicity and efficiency.
Now let’s explore step by step how to configure Keycloak to act as an OIDC provider for a Kubernetes-based environment like Gardener:
1. Keycloak Setup
Create a Client Realm:
Keycloak ships with an “admin” realm by default. It’s best practice to create a new realm for client authentication, ensuring separation of concerns.
Create a new realm named client or a similar meaningful name.
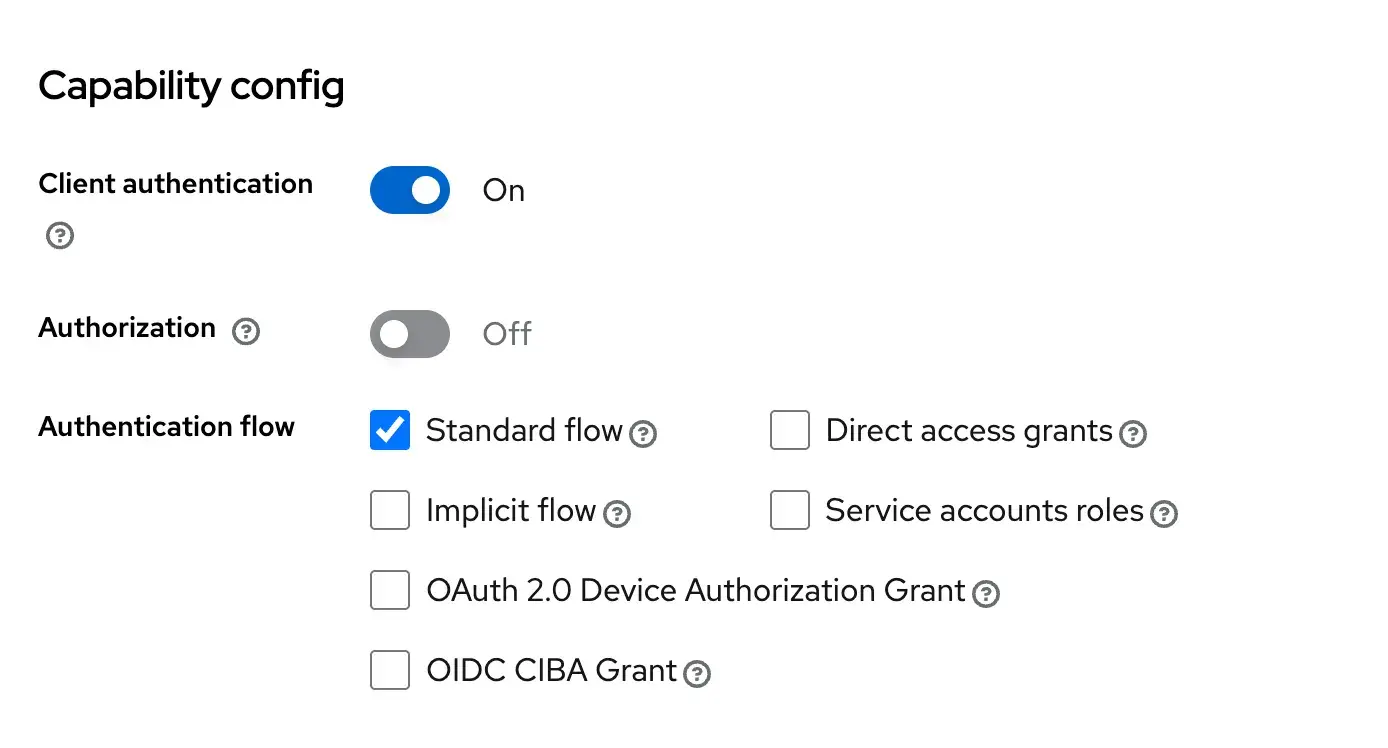
Create the Kubernetes Client:
Once the realm is created, set up a Keycloak client for Kubernetes. Kubernetes API can use CA to validate OIDC client trust, but we need client password for Gardener dashboard
Go to Clients in the new realm and click Create.
Set the client ID to kubernetes, enable OIDC, and set the client protocol to openid-connect.
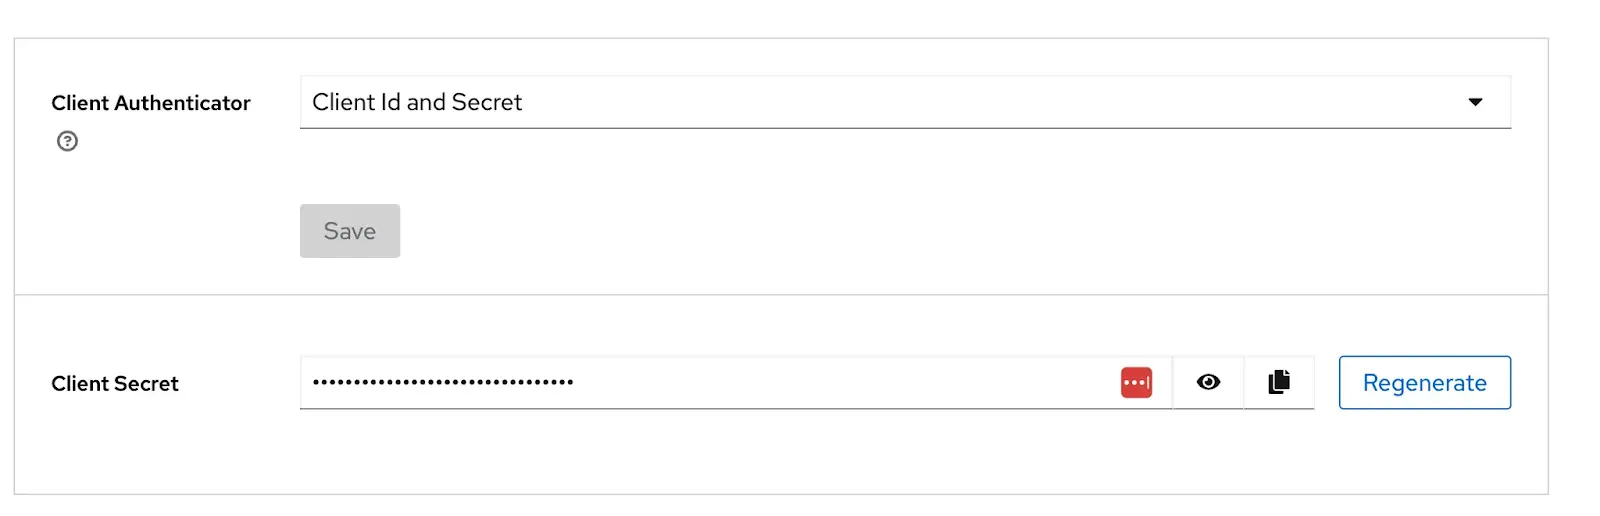
Ensure the client is set to confidential to generate a client secret.
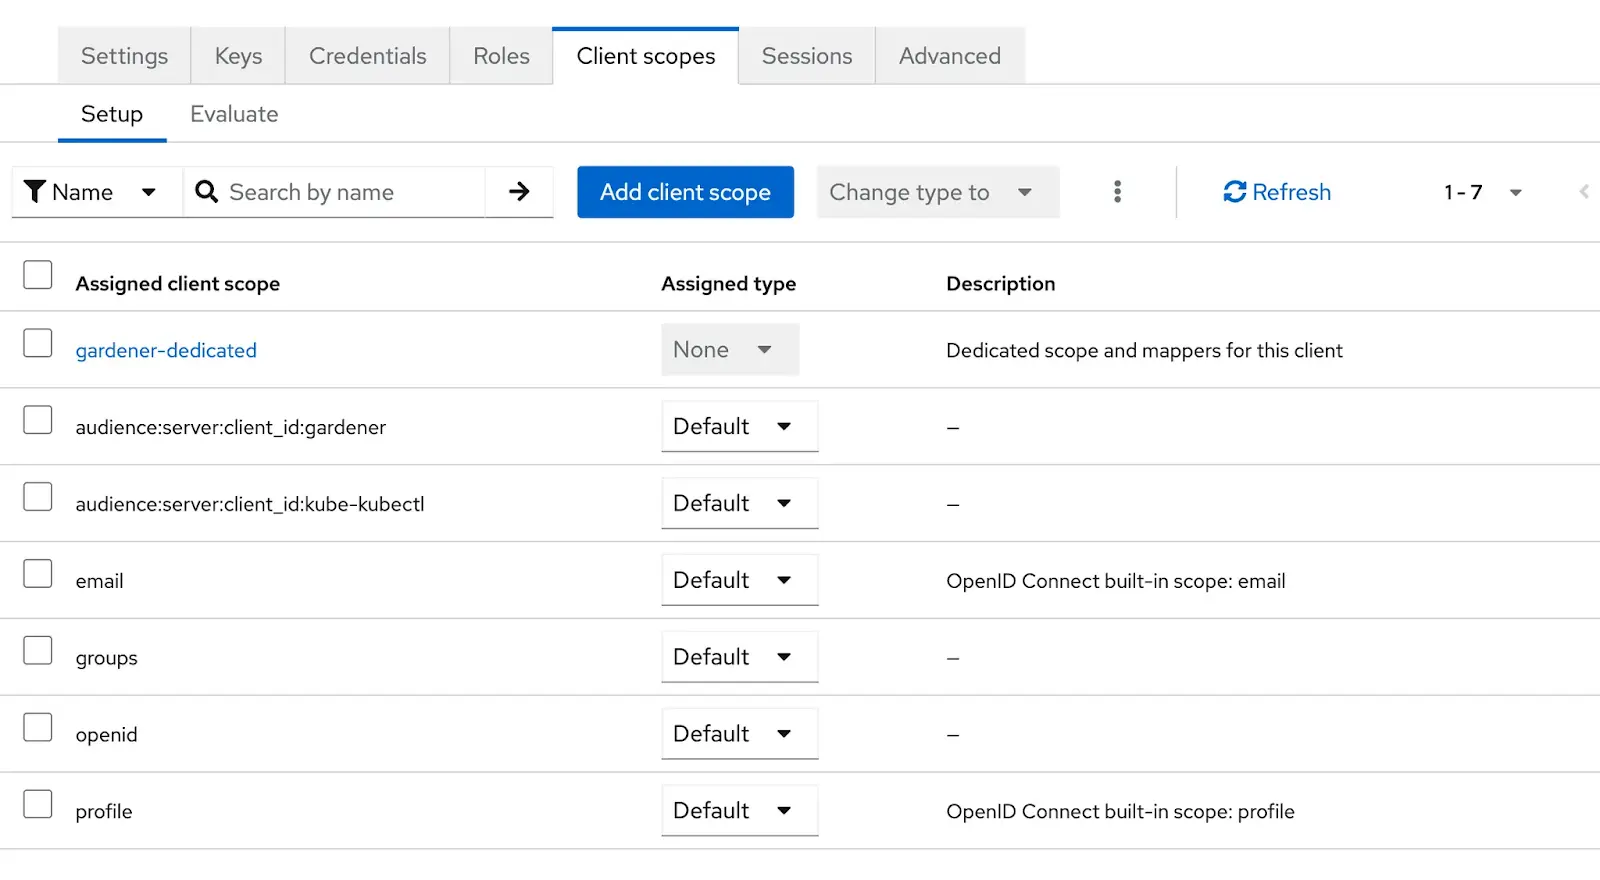
Configure Required Scopes:
Add the necessary scopes under the Client Scopes tab to avoid authentication errors:
openid
email
profile
groups
audience:server:client_id:gardener
Audience:server:client_id:kube-kubectl
These scopes are required by Gardener dashboard, if you don’t add them the Dashboard will show you the following error when you try to login:
Kubernetes integration is straightforward. Modify the kube-apiserver.yaml manifest located at /etc/kubernetes/manifests and append the following configurations:
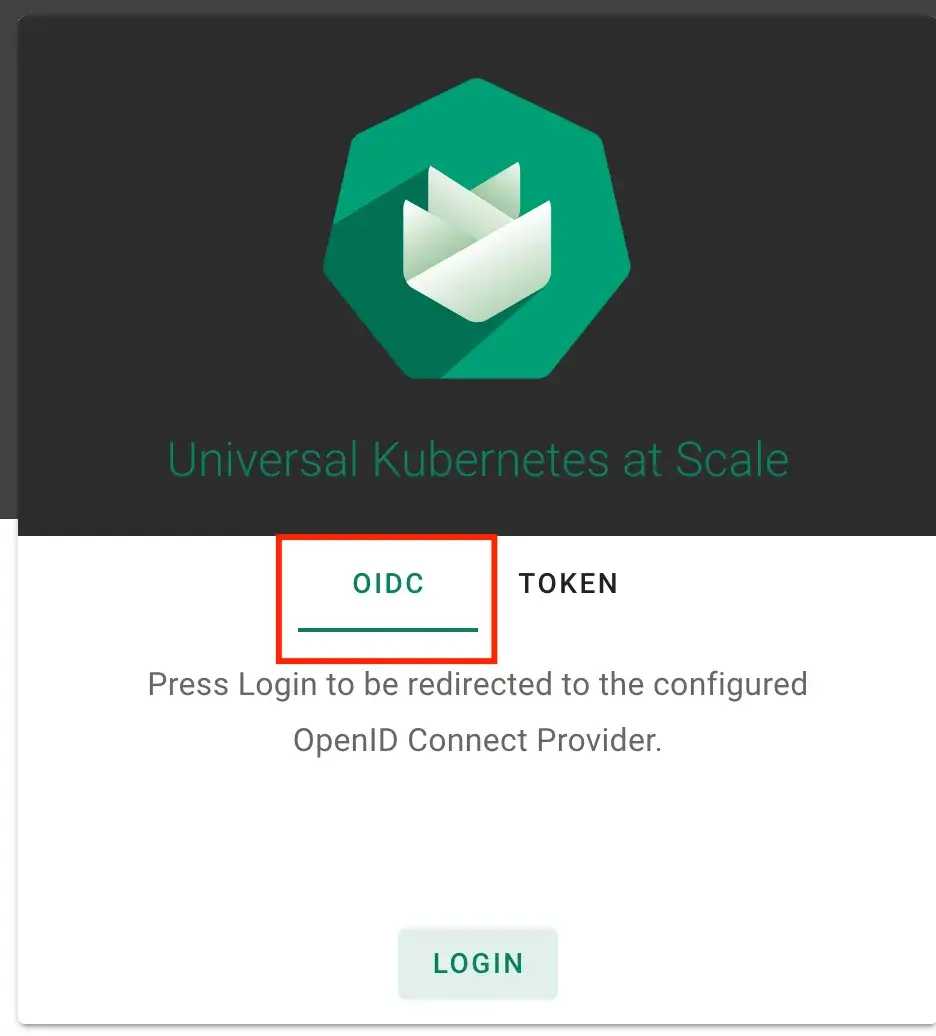
With everything set up, navigate to the Gardener Dashboard UI, select the OIDC tab, and log in using the Keycloak credentials. If all configurations are correct, you should successfully authenticate and access the dashboard.
Closing Thoughts
Setting up OIDC with Keycloak for Gardener was a technical challenge that pushed us towards problem-solving and innovation. While the process was intricate and documentation was scarce, we managed to complete the implementation successfully and gain experience along the way.
If your organization is looking to centralize Kubernetes authentication and authorization, Cloudification’s DevOps team is here to help. Our team has experience working with managed Kubernetes. Contact us to unlock secure, streamlined authentication for your managed Kubernetes clusters today!